This article shows the steps on how to control led with arduino, Bluetooth and Android. Normally the content I post is about C++ concepts, but since this code was used in my latest university engineering project, I wanted to break down and show 3 different technologies being combined together for an application. You can find more details of that project on my personal website.
Click here to download the source code
Setting up the hardware and IDE
You will need the following to control led with arduino
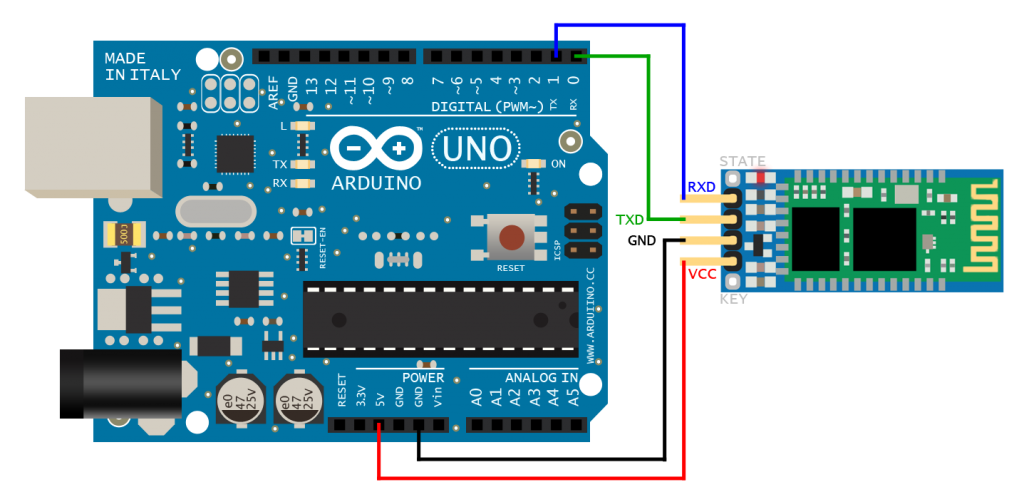
The schematic of the Bluetooth module to the Arduino UNO Board
Setup the Bluetooth code and Library
The tutorials which are currently online regarding the Bluetooth communication code are outdated and I was trying to use that old code for my project, which ended up being a very painful experience, as I spent 3 weeks trying to get the Bluetooth code to work. Luckily I eventually found a solution. That is to use a Bluetooth library dedicated to work with the Arduino microcontroller. The library is called the Bluetooth SPP Library.

Once the Bluetooth library has been set up and imported in Android Studio, use the code below for the Bluetooth communication between the Arduino microcontroller and Android app.
MainActivity.java
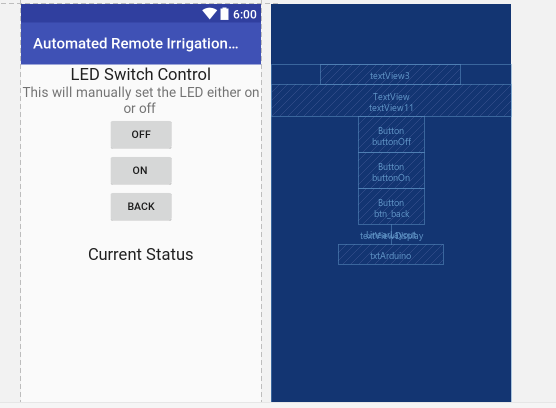
Setup the GUI Menu and Buttons
In Android Studio, create the basic GUI by adding in a couple of buttons and use the code below to link up the buttons to the Bluetooth code.
IrrigationControl.java
Arduino code
Once the Android app code is complied and running, we can then implement the Aruduino code that will receive the bluetooth commands from the Android app and control the LED. Copy and paste the codebelow into the Arduino IDE and compile the code. Once it’s been compiled, send it to the Arduino microncontroller via USB.